What Is a Prop Firm and Why Does Regulation Matter?
A proprietary trading firm — in the retail context — offers traders access to a funded trading account in exchange for passing a performance evaluation (the “challenge”) and sharing a percentage of profits. Traders pay a challenge fee, typically ranging from $50 to $600 depending on account size, to enter the evaluation. Those who pass receive a simulated funded account and begin sharing profits with the firm.
In the traditional institutional sense, prop trading firms use their own capital to trade financial markets — a clearly defined and widely regulated activity. The retail prop firm model is fundamentally different. In most cases, no real capital is deployed when a funded trader places trades. The firm operates a simulated trading environment backed by a liquidity provider relationship, with payouts funded primarily from the continuous inflow of challenge fees from new participants.
This structural reality is the core reason regulation is complicated. Because traders are not depositing client funds and the firm is not managing investment portfolios on behalf of clients, the standard regulatory frameworks that protect retail investors — MiFID II in the EU, the Commodity Exchange Act in the US, the Financial Services and Markets Act in the UK — do not straightforwardly apply. Prop firms have occupied this gap deliberately and profitably.
Why does this matter? Because without regulatory protection, a trader who passes a challenge, earns a profit entitlement, and faces a denied payout has no regulatory authority to escalate to. They cannot file a complaint with the FCA. They cannot pursue the CFTC. Their only recourse is civil litigation in the firm’s chosen jurisdiction — an expensive, uncertain, and often impractical path. The importance of understanding this before joining any prop firm cannot be overstated.
The Regulatory Reality in 2026: An Industry in Transition
The prop trading industry entered 2026 in a fundamentally different state to where it stood two years prior. The combination of a major platform provider crackdown, accelerating regulatory scrutiny, and the collapse of 80 to 100 firms between 2024 and early 2026 has produced a landscape that is simultaneously more mature and more dangerous for uninformed traders.
The firms that survived the 2024 shakeout — FTMO, Topstep, The5%ers, FundedNext, Apex Trader Funding — did so because they had operating models built on sustainable economics: genuine capital reserves, proper liquidity provider relationships, and payout obligations structured to survive volatile market periods. FTMO generated £329 million in revenue in 2024 — a 53 percent year-over-year increase — with £62.5 million in net profit, confirming that a well-run prop firm is a genuinely viable business, not a short-term fee collection scheme.
The firms that failed shared a different profile: recent launches (many operating for less than two years), dependency on a single platform provider, payout obligations that outpaced challenge fee revenue, and in some cases, business models indistinguishable from Ponzi schemes where earlier traders were paid using fees from new entrants.
For traders evaluating prop firms in 2026, this history is not academic — it is the primary tool for distinguishing between firms likely to survive the next 12 to 24 months and those that are not. The regulatory gap means that history and track record are the only protections available, because the legal framework is not yet there to provide them.
How We Researched This Guide
The TopBrokers360 research team compiled this guide using the following verified sources and methodology:
- Regulatory filings and official statements: CFTC enforcement actions and RED List, FCA press releases and prosecution announcements, Consob investor warnings (Italy), Belgian FSMA and Spanish CNMV statements, Czech National Bank guidance, and ESMA supervisory action documentation.
- Court records: Special Master’s Report in the CFTC vs MyForexFunds case (May 2025); SEC enforcement materials relating to connected individuals in SurgeTrader (2023–2024).
- Industry data sources: Finance Magnates reporting on firm closures; VeritasChain Standards Organization analysis of the 2024 collapse; ForTraders industry statistics compilation; DealPropFirm verified shutdown database.
- Payout verification: Trustpilot reviews cross-referenced against Reddit and Discord community reports for the firms reviewed; TraderSecondBrain payout proof database; PropFirmRated independent assessments.
- Direct regulatory framework analysis: MiFID II applicability analysis; CFTC Rule 4.7 amendments (March 2025 compliance date); Digital Asset Market Clarity Act (CLARITY Act) House passage July 2025; FIXML reporting deadline June 3, 2026; EU AI Act timelines.
Global Regulatory Landscape: Jurisdiction-by-Jurisdiction Breakdown
The regulatory treatment of prop firms varies significantly by jurisdiction. The table below summarises the current state in each major market as of June 2026:
| Jurisdiction | Regulator(s) | Current Status | Key Actions | Practical Impact for Traders |
| United States | CFTC, SEC, NFA | Gray area — no specific prop firm licence required | CFTC vs MyForexFunds (2023, dismissed 2025); RED List now 240+ entities; CLARITY Act passed House July 2025 | Futures-based prop firms face most scrutiny. Forex challenge models largely unregulated. US traders restricted from some overseas firms. |
| European Union | ESMA, national NCAs | Rising scrutiny — MiFID II applicability under review | ESMA Common Supervisory Action (2024); Czech CNB signals MiFID may apply; FIXML reporting mandate June 3, 2026 | Firms based in EU face growing pressure. MiFID II licence may become required. EU AI Act high-risk obligations active Aug 2026. |
| Italy | Consob | Warning issued — enforcement expected | July 2024 warning citing ‘contrived’ challenge designs; described as ‘finance video games’ | Italian traders face most regulated environment in EU. Consob actively monitoring and may take enforcement action against non-compliant firms. |
| Belgium / Spain | FSMA / CNMV | Public warnings issued | Both echoed Consob concerns; framed prop trading as high-risk for retail participants | Traders in these markets should apply extra caution and verify firm legitimacy independently. |
| United Kingdom | FCA | Active enforcement on marketing | May 2024: FCA charged 9 individuals for unauthorised forex promotion; June 2025: international operation, 650+ social media takedowns, 50+ website shutdowns | UK traders have the strongest consumer marketing protection. Prop firms cannot use unlicensed influencers to promote products. |
| Australia | ASIC | Influencer crackdown active | ASIC warnings on ‘finfluencers’ promoting high-risk products without disclosure; ongoing monitoring | Australian traders should verify that any social media promotion they act on comes from a licensed source. |
| Czech Republic | CNB | MiFID applicability under review | CNB statement June 2024 that some prop firm models ‘may be subject to MiFID’; directly relevant to FTMO | Significant: FTMO headquartered in Czech Republic. CNB ruling could reshape the largest prop firm’s operating model. |
The overarching pattern across all jurisdictions is consistent: regulators have recognised that the prop firm industry exists in a grey area, are developing frameworks to address it, but have not yet reached a settled position on how to classify or regulate it. The practical implication for traders is that jurisdictional protection varies widely and cannot be relied upon as a primary safeguard.
The 2024–2025 Industry Collapse: What Happened and What It Revealed
The MetaQuotes Crackdown (February 2024)
The single largest catalyst for the 2024 collapse was MetaQuotes’ February 2024 decision to revoke trading platform licences from prop firms operating without proper broker relationships or in jurisdictions where MetaQuotes determined their operating model was problematic. Within nine months of that decision, MetaTrader’s market share among prop firms dropped from 48 percent to 24 percent.
The impact was immediate and severe. Prop firms that had been entirely dependent on MetaTrader’s infrastructure had no viable alternative platform ready to deploy. Some suspended operations immediately. Others scrambled to find alternative platforms — cTrader, proprietary solutions, or white-label products — but the operational disruption accelerated cash flow problems in firms already running thin margins on payout obligations.
Notable Collapses: The Documented Cases
MyForexFunds (CFTC action August 2023): The CFTC and the Ontario Securities Commission simultaneously acted against MyForexFunds, alleging the firm was operating as an unregistered commodity pool and taking the opposite side of trader trades — profiting directly when traders lost. At the time, MFF claimed over 100,000 traders and millions in payouts. Trader accounts were frozen overnight. Outstanding payouts were never processed. The firm’s response was complex: by May 2025, a Special Master recommended dismissal of the CFTC’s complaint with prejudice and recommended sanctions against the CFTC itself for procedural misconduct — including failing to account for information provided by the Ontario Securities Commission before filing. The case demonstrated both the risk traders face and the difficulty regulators encounter in establishing legal ground truth in an unverifiable trading environment.
SurgeTrader (closed May 2024): SurgeTrader’s closure carried significant background concerns — the firm’s founder was connected to an individual charged by the SEC in 2023 with operating a $35 million Ponzi scheme. CEO statements acknowledged $2 million-plus in denied payouts at closure — approximately 10 percent of obligations at the time. By August 2024, only 30 percent of pending trader payouts had cleared. The firm faced multiple lawsuits. SurgeTrader’s collapse illustrated a critical structural vulnerability: prop firms that do not control their own trading infrastructure are one decision by a third-party provider away from operational failure.
TrueForexFunds (closed May 2024): TrueForexFunds explicitly cited financial insolvency at closure — one of the few firms to publicly acknowledge that escalating payout obligations had outpaced challenge fee revenue. The firm had been paying traders, but the economics were unsustainable. The closure confirmed what regulators had suspected: many prop firms operated business models where revenue from new challenge fees funded payouts to successful traders from earlier cohorts, making the entire structure contingent on continuous new trader acquisition.
FundingTicks (closed January 2026): FundingTicks’ December 2025 rule changes — introducing a one-minute scalping holding requirement, higher profit targets, and a reduced profit split — were applied retroactively, resulting in the cancellation of previously earned profits and completed evaluation stages. The backlash was immediate and severe. Trustpilot ratings collapsed. By January 2026, the firm announced it was winding down, offering a refund and payout program. FundingTicks became the industry’s cautionary example of retroactive rule application — a practice that, in the absence of regulatory prohibition, firms are legally permitted to engage in.
MyFundedFX (closed February 2026): MyFundedFX ceased operations without advance warning in February 2026, stopping withdrawal processing and closing accounts. Funded traders with active accounts and pending payouts had no recourse. The closure demonstrated that even a firm with a reasonably positive reputation at mid-tier level — neither a clear scam nor a market leader — can fail suddenly, leaving traders with no recovery path.
What the Collapse Revealed
Across all of the closures, a consistent pattern emerged that regulators and independent analysts have documented: the fundamental opacity of prop firm trading operations. Traders had no way to independently verify whether their trades were being executed against real market liquidity or simulated fills. Regulators encountered the same problem — even the CFTC, with enforcement powers, could not definitively establish trading record authenticity in the MyForexFunds case. This opacity is the structural vulnerability that the industry’s next regulatory phase must address.
How Prop Firms Are Structured (and Why Regulation Is Complicated)
Understanding why prop firms are difficult to regulate requires understanding their business model at a structural level. The following breakdown explains each element and its regulatory implications:
The Challenge Fee Model
Traders pay a fee — not a deposit — to enter an evaluation. The firm characterises this as payment for access to a simulated trading environment, educational resources, or platform access. Because it is not a client deposit, it does not trigger client fund protection requirements. Because it is not an investment, it does not trigger investment firm licensing. This characterisation is the foundation of prop firms’ regulatory exemption — and it is exactly what regulators in Italy, the Czech Republic, and Belgium are now questioning.
Simulated vs Live Trading
In most retail prop firm models, the evaluation phase involves simulated trading — trades are placed in a demo environment backed by a liquidity provider connection, but no real capital is deployed in the market. Some firms claim that funded accounts involve real capital deployment; others are explicit that trading remains simulated throughout. This distinction matters for regulatory classification: if no real market activity occurs, it is difficult to argue that financial services regulation applies. Italy’s Consob used this exact logic when describing prop trading as a “finance video game aimed at passing skill tests.”
Where the Revenue Comes From
A well-run prop firm generates revenue from three sources: challenge fees from the majority of traders who fail evaluations, profit splits from the minority who succeed and trade profitably, and potentially from the spread between real market execution and simulated fills where applicable. The business is viable when the volume of challenge fees from unsuccessful traders exceeds the payout obligations to successful ones. When that ratio inverts — because too many traders pass, or because market volatility produces unusually large winning positions — the business model breaks.
This is why several 2024 closures cited “financial insolvency” rather than fraud: they were not necessarily dishonest operations, but businesses whose economics became unsustainable when successful trader cohorts grew faster than challenge fee revenue.
Key Rule Changes Reshaping the Industry in 2026
FIXML Reporting Mandate (June 3, 2026)
Prop firms involved in futures trading are required to transition to the FIXML data submission standard by June 3, 2026, replacing the outdated 80-character legacy format. This upgrade improves data quality and streamlines automated compliance processes. For futures-adjacent prop firms, compliance with FIXML is not optional — it is a prerequisite for continued operations in futures markets. Firms that have not completed this transition face operational disruption.
EU AI Act High-Risk Obligations (August 2026)
The EU AI Act, which entered force in August 2024, explicitly mentions algorithmic trading systems as a category subject to its provisions. High-risk AI system obligations take effect in August 2026, with penalties reaching €35 million or seven percent of global turnover for non-compliance. For prop firms operating in the EU that use AI-driven risk management, automated evaluation scoring, or fraud detection systems, these obligations introduce a new compliance layer that many smaller operations are not equipped to handle.
CFTC Rule 4.7 Amendments (Compliance March 2025)
The CFTC finalised amendments to Rule 4.7 in September 2024, updating portfolio requirements for “qualified eligible persons” with a compliance date of March 26, 2025. While this primarily affects commodity trading advisors and pool operators, it is directly relevant to prop firms that have structured their operations in ways that could be classified as commodity pool operations — the exact classification the CFTC attempted to apply to MyForexFunds.
Digital Asset Market Clarity Act (CLARITY Act — House Passage July 2025)
The CLARITY Act passed the US House of Representatives in July 2025 with bipartisan support. If enacted, it would expand the definitions of Commodity Trading Advisors and Commodity Pool Operators to include managers and advisers involved with digital assets. This would require many crypto-focused prop firms to register with the CFTC — significantly increasing the compliance burden for firms that have operated in the crypto space without registration.
KYC and AML Standards Acceleration
Even without sector-specific regulation, payment providers and banking partners are demanding higher KYC (Know Your Customer) and AML (Anti-Money Laundering) compliance from prop firms. In 2026, this has become a de facto standard: firms unable to satisfy payment processor requirements for identity verification and transaction monitoring are finding themselves cut off from banking infrastructure, effectively forcing compliance regardless of whether a regulatory mandate exists.
MetaTrader Market Share Realignment
The February 2024 MetaQuotes crackdown permanently restructured the prop firm platform landscape. MetaTrader’s share among prop firms dropped from 48 percent to 24 percent. The surviving firms have diversified onto cTrader, proprietary platforms like Topstep’s TopstepX, and multi-platform arrangements. This diversification reduces single-provider dependency risk — but also creates a more complex compliance environment for firms now managing relationships with multiple platform providers.
The Legitimate Firms Still Standing: Verified Track Records
The following five firms have been selected based on operating history, independently verified payout records, rule transparency, and demonstrated ability to sustain operations through the 2024–2025 industry shakeout. All data reflects publicly available information as of June 2026.
1. FTMO — Best for Reliability-First Traders
| Founded | 2015 (Prague, Czech Republic) |
| Best for | Traders who prioritise firm longevity and payout certainty above maximum split percentage |
| Max Account Size | $200,000 (standard); higher via scaling |
| Profit Split | 80% standard; 90% after Elite status |
| Payout Speed | 1–2 business days — fastest among major firms |
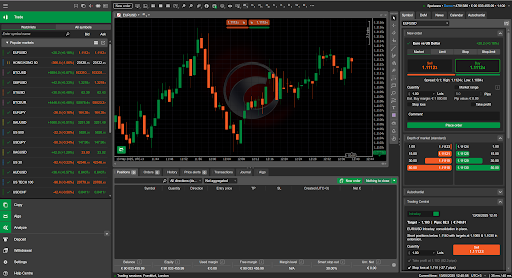
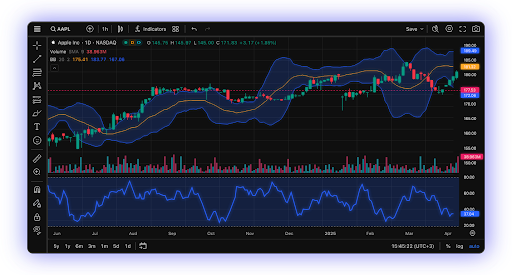
| Platforms | MT4, MT5, cTrader, TradingView |
| Challenge Fee | Refunded on first successful payout — a genuine differentiator |
| US Access | FTMO US via OANDA partnership (launched 2025) |
FTMO is the benchmark against which all other prop firms are measured in 2026, and for substantive reasons. Ten years of continuous operations without a payout scandal, a challenge fee refund policy on first payout that puts real skin in the game, and the January 2025 acquisition of OANDA — backed by a £250 million credit facility from Czech banks led by UniCredit — represent a combination of operational track record and institutional backing that no other prop firm can currently match.
FTMO generated £329 million in revenue in 2024, a 53 percent year-over-year increase, with £62.5 million in net profit. These are not claims from the firm’s own marketing — they are the metrics that the industry has verified from financial disclosures and third-party reporting. The OANDA acquisition is particularly significant: it gives FTMO access to a regulated brokerage infrastructure, providing US traders with a compliant access route while simultaneously moving the firm closer to a regulated operating model than any other prop firm.
The key caveat is cost. FTMO’s challenge fees are among the most expensive in the industry, and the 80 percent starting profit split feels conservative when newer firms offer 90 to 95 percent. FTMO trades on reputation and longevity, and charges accordingly. For traders who prioritise the firm being in business when they request their payout, that premium is rational.
Pros
- 10 years of verified operations without a payout scandal — the longest clean track record in the industry
- Challenge fee refunded on first successful payout — aligns firm and trader incentives
- Fastest payout processing among major firms: 1–2 business days
- OANDA partnership provides regulated brokerage access for US traders and institutional credibility
- Multi-platform support: MT4, MT5, cTrader, and TradingView
Cons
- Higher challenge fees than most competitors — premium pricing reflects reputation, not value alone
- 80% starting profit split is below the 90–95% offered by newer competitors
- Czech CNB reviewing MiFID applicability — regulatory reclassification could affect operating model
- Rotating list of restricted jurisdictions limits access for traders in certain regions
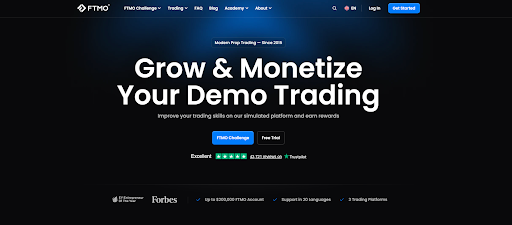
2. Topstep — Best for CME Futures Traders
| Founded | 2012 (Chicago, USA) |
| Best for | Futures-only traders; stability-first; CME markets (ES, NQ, CL, GC) |
| Max Account Size | $150,000 |
| Profit Split | 90% |
| Payout Speed | 7–10 business days |
| Platforms | TopstepX (proprietary) |
| Evaluation | Single-step Trading Combine; no maximum time limit; minimum 2 trading days |
| Total Payouts | $1.1 billion+ distributed since 2012 |
Topstep launched in 2012, making it the longest-running prop firm in the industry by a significant margin. Its exclusive focus on CME futures — ES, NQ, CL, GC, and other CME-listed contracts — is simultaneously its strongest differentiator and its most significant limitation. For traders who specifically trade futures, Topstep’s 14-year operating history, $1.1 billion in verified payouts, and single-step evaluation model provide a level of credibility and simplicity that no other firm in the futures space matches.
The TopstepX proprietary platform, developed in-house, gives the firm control over its own technology infrastructure — reducing the platform dependency risk that contributed to so many 2024 closures. This is a meaningful operational advantage. Topstep is not at risk of losing access to its trading platform because of a third-party provider decision.
The trade-off is focus. Topstep does not offer forex, indices (beyond CME), commodities outside CME products, or crypto. Traders whose primary market is forex will not find Topstep relevant regardless of its operational quality.
Pros
- Founded 2012 — the longest-operating prop firm in the industry; 14 years of consistent payouts
- $1.1 billion+ in verified trader payouts — the largest documented payout total in the industry
- Proprietary TopstepX platform eliminates third-party platform dependency risk
- Single-step evaluation with no maximum time limit is straightforward and trader-friendly
- CME futures focus means clear regulatory adjacency to established futures exchange infrastructure
Cons
- Futures only — no forex, crypto, or non-CME instruments; irrelevant for non-futures traders
- Slowest payout processing among the firms reviewed: 7–10 business days
- TopstepX platform lock-in — traders who prefer MT4, MT5, or cTrader cannot use them
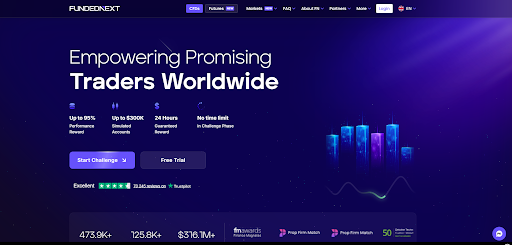
3. The5%ers — Best for Long-Term Scaling
| Founded | 2016 (Israel) |
| Best for | Forex traders focused on gradual, long-term funded account scaling |
| Max Account Size | Up to $4,000,000 (via scaling program) |
| Profit Split | Up to 100% (scaling milestone-based) |
| Payout Speed | 3–10 business days |
| Platforms | MT4, MT5 |
| Entry Point | 3-step evaluation from $22 — lowest barrier to entry among reviewed firms |
The5%ers’ scaling model is genuinely unique in the industry. Where most prop firms offer a fixed maximum account size, The5%ers structure their program around progressive milestones that can ultimately reach $4 million in allocated capital and a 100 percent profit split for traders who complete all stages. This is not a day-one offer — reaching 100 percent split and multi-million capital requires sustained, disciplined trading performance over a meaningful period. But for traders who view prop trading as a long-term professional development path rather than a quick payout opportunity, The5%ers’ model is the most aligned with that approach.
The entry barrier is genuinely low: the three-step evaluation starts at $22, the lowest of any reviewed firm. This makes The5%ers accessible to traders who want to begin with minimal financial commitment while still accessing a firm with a verified eight-year track record.
The limitation is patience. The scaling path to maximum capital and split is long, and traders who want immediate high capital deployment or maximum profit splits from day one will find FTMO or FundedNext more suitable.
Pros
- Scaling potential to $4,000,000 in capital and 100% profit split — no other reviewed firm matches this ceiling
- 8-year operating history with no documented payout scandals
- Lowest entry point: 3-step evaluation from $22
- Career-development framing of the prop firm model — most aligned with long-term professional growth
Cons
- MT4 and MT5 only — no cTrader or TradingView support
- 100% split and maximum capital require patience — multi-milestone progression takes time
- Israel-based jurisdiction — lower regulatory transparency than EU-domiciled firms
4. FundedNext — Best for High Profit Split & News Trading
| Founded | 2022 |
| Best for | Traders who want maximum profit split and news trading flexibility |
| Max Account Size | $200,000 |
| Profit Split | Up to 95% (Stellar accounts) |
| Payout Speed | 3–10 business days |
| Platforms | MT4, MT5, cTrader |
| Total Payouts | $261 million+ since 2022 |
| News Trading | Permitted on funded accounts — a key differentiator |
FundedNext is the fastest-growing firm among the survivors of the 2024 shakeout, having distributed over $261 million in payouts since its 2022 launch. Its Stellar accounts offer up to 95 percent profit split — the highest fixed split among the firms reviewed — and its explicit permission of news trading on funded accounts makes it the preferred choice for traders whose strategies involve high-impact economic event entries.
The caveat for FundedNext is age. Three years of operating history is meaningful — it places the firm in a different category from the sub-two-year operations that characterised many 2024 closures — but it does not match the decade-plus track records of FTMO, Topstep, and The5%ers. Traders choosing FundedNext are making a calculated bet on a firm that has demonstrated sound economics so far, without the long-term proof of FTMO’s ten-year record.
For traders who specifically want news trading access and the highest profit split available from a firm with verified payouts, FundedNext is the clearest choice in 2026.
Pros
- 95% profit split on Stellar accounts — highest fixed split among reviewed firms
- News trading permitted on funded accounts — rare and valuable for macro-driven traders
- $261 million+ in payouts since 2022 — strong three-year payout record
- Multi-platform support: MT4, MT5, and cTrader
Cons
- 3-year operating history — shorter track record than FTMO, Topstep, or The5%ers
- No TradingView support as of June 2026
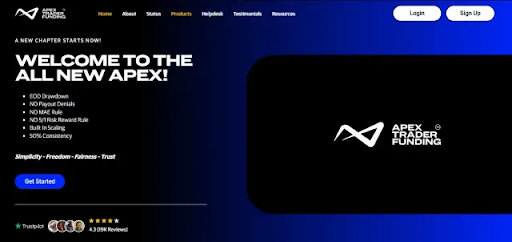
5. Apex Trader Funding — Best for Futures Traders Wanting Platform Flexibility
| Founded | 2021 |
| Best for | Futures traders wanting multiple simultaneous accounts and maximum platform choice |
| Max Account Size | $300,000 (per account); up to 20 simultaneous accounts |
| Profit Split | 100% first $25,000 earned; 90% thereafter |
| Payout Speed | Varies by account and withdrawal method |
| Platforms | 14+ platforms — the widest platform choice of any reviewed firm |
| Drawdown Type | End-of-day trailing drawdown — important distinction from intraday trailing |
Apex Trader Funding occupies a distinct niche: the firm that gives futures traders the most flexibility in terms of simultaneous accounts, platform choice, and initial profit retention. Fourteen-plus supported platforms — the widest of any reviewed firm — and permission to hold up to 20 simultaneous funded accounts makes Apex the preferred choice for traders who want to scale their funded trading across multiple positions and strategies simultaneously.
The 100 percent retention on the first $25,000 earned is the highest initial profit retention in the industry. For traders who are confident in their ability to generate consistent returns, this structure is significantly more valuable than a flat 80 or 90 percent split from the first dollar.
The important caveat is the intraday trailing drawdown used in most Apex accounts. Unlike end-of-day drawdown calculations — which only adjust at close and give traders breathing room during open positions — Apex’s trailing drawdown follows open profit in real time. A position that peaks at a $3,000 unrealised gain and then retraces locks in a higher drawdown threshold that can breach the account limit before the position closes. Traders who do not fully understand this mechanism risk account failure on trades they consider profitable.
Pros
- 14+ supported platforms — the widest platform flexibility of any reviewed firm
- 100% profit retention on first $25,000 — highest initial retention in the industry
- Up to 20 simultaneous funded accounts — significant scaling potential
- Frequent promotional pricing — account fees regularly discounted 80–90%
Cons
- Intraday trailing drawdown is aggressive and can fail accounts on profitable but retracing positions
- 4-year operating history — shorter than FTMO and Topstep
- Futures only — no forex access
Prop Firm Comparison Table (Verified Firms 2026)
| Firm | Since | Best For | Max Capital | Profit Split | Payout Speed | Platforms | Regulation Status |
| FTMO | 2015 | Reliability-first traders; forex & multi-asset | $200,000 | 80–90% | 1–2 business days | MT4, MT5, cTrader, TV | Unregulated; Czech CNB reviewing MiFID applicability |
| Topstep | 2012 | CME futures traders; stability above all | $150,000 | 90% | 7–10 business days | TopstepX | Futures-adjacent; longest operating history in industry |
| The5%ers | 2016 | Long-term scaling; forex focus; 100% split path | Up to $4M (scaled) | Up to 100% | 3–10 business days | MT4, MT5 | Unregulated; Israel-based; long clean track record |
| FundedNext | 2022 | High profit split; news trading permitted | $200,000 | Up to 95% | 3–10 business days | MT4, MT5, cTrader | Unregulated; growing track record; 3-year history |
| Apex Trader Funding | 2021 | Futures; multiple accounts; flexible platforms | $300,000 | 100% first $25K; 90% after | Varies | 14+ platforms | Futures-adjacent; allows up to 20 simultaneous accounts |
Due Diligence Checklist: What to Verify Before Joining
In the absence of regulatory protection, due diligence is the trader’s only safeguard. The following checklist represents the minimum verification steps every trader should complete before paying any challenge fee:
| Checklist Item | What to Look For | Red Flag |
| Business Registration | Verifiable company registration in a named jurisdiction; accessible on public registry | Anonymous ownership, no registered entity, PO box only address |
| Operating History | 3+ years of continuous, uninterrupted operations with verifiable payout records | Founded less than 2 years ago; no verifiable history pre-dating 2023 |
| Payout Track Record | Thousands of verified payouts on Trustpilot, Reddit, YouTube; specific amounts and timelines cited | Only platform-hosted testimonials; payout claims without trader verification |
| Trustpilot Pattern | High volume of recent reviews (500+); specific payout mentions; balanced positive and negative reviews | Sudden spike in 5-star reviews; all reviews vague; many recent 1-star payout complaints |
| Rule Change History | Rules stable and clearly documented; any changes communicated in advance and not applied retroactively | Retroactive rule changes; profit clawbacks; moving goalposts after traders pass |
| Platform Infrastructure | Named, established platform (MT4, MT5, cTrader, TradingView, TopstepX); not proprietary-only | Relies solely on one third-party provider; no broker relationship disclosed; platform not independently recognisable |
| Terms & Conditions | Clear, specific language; unambiguous drawdown definitions; precise payout timelines | Vague ‘toxic flow’ clauses; broadly worded disqualification terms; unlimited discretion given to firm |
| Jurisdiction Risk | Firm located in reputable jurisdiction with accessible legal recourse | Opaque jurisdiction; no legal recourse stated; no dispute mechanism described |
| KYC / AML Process | Standard identity verification required before payout; documented AML process | No identity verification; payouts before KYC; claims KYC is not required |
| Marketing Claims | Profit split and scaling terms clearly defined with milestone conditions | Vague ‘90% profits’; unlimited scaling claims; guaranteed income language |
10 Red Flags That Signal a Prop Firm Is Dangerous
- Recent founding date (less than 2 years). Most 2024 closures were firms operating for under two years. Operating history is the single most predictive variable of survival.
- No verifiable business registration. Every legitimate firm is registered as a legal entity in a named jurisdiction. If you cannot find the registration on a public registry, walk away.
- Anonymous ownership. Legitimate firms have named leadership. Firms that obscure ownership structures are operating without accountability.
- Retroactive rule changes. If a firm has a documented history of changing profit splits, holding requirements, or evaluation criteria after traders have already qualified under previous rules, this is the most direct signal of bad faith.
- Sudden surge in negative Trustpilot reviews related to withdrawals. This pattern — documented in TrueForexFunds, SurgeTrader, and FundingTicks — typically precedes formal closure by one to three months.
- Vague or broadly worded Terms & Conditions. Phrases like “toxic flow,” “prop firm exploitation,” or unlimited firm discretion to void accounts without specific criteria are red flags embedded in legal language that shift all risk to the trader.
- Single platform dependency. Firms relying entirely on one third-party platform provider are one provider decision away from operational failure, as the 2024 MetaQuotes crackdown demonstrated.
- No KYC required before payout. Every legitimate firm requires identity verification before processing payouts. A firm that does not is either extremely new or avoiding regulatory traceability.
- Aggressive influencer marketing with performance claims. Regulators in the UK, Australia, and Italy have specifically targeted this marketing channel. Firms that rely primarily on paid influencer promotion with income claims have a different risk profile than firms that grow through trader reputation and word of mouth.
- No disclosed liquidity provider or broker relationship. Legitimate firms are able to state who their liquidity provider or partner broker is. A firm that cannot or will not disclose this is not operating transparently.

Conclusion
Prop trading in 2026 is a genuinely viable path to funded trading capital — and a genuinely dangerous one if approached without understanding the regulatory reality. The industry has paid hundreds of millions of dollars to successful traders. It has also failed thousands of others without recourse when firms collapsed, changed rules retroactively, or were operating unsustainable business models from the start.
The regulatory framework for retail prop firms is in active development across every major jurisdiction, but it has not yet arrived. In its absence, the trader’s protection comes entirely from informed due diligence: verifying operating history, checking independent payout records, reading Terms & Conditions for retroactive change clauses, and choosing firms that have demonstrated economic sustainability through the hardest period the industry has faced.
The firms most likely to be operating and paying traders in 2027 and 2028 are the ones that were already doing both in 2022 and 2023. The evaluation challenge is not just about passing the profit target — it is also about evaluating the firm itself before you commit a single dollar of challenge fees.
FAQs
Are prop firms legal?
Yes, prop firms are legal in most jurisdictions. Their legality is not the relevant question — the relevant question is whether they are regulated, which most are not. Being legal and being regulated are different things. A prop firm can be a legally registered company operating entirely within the law while offering traders zero regulatory protection for their evaluation fees or profit entitlements.
What happens to my money if a prop firm shuts down?
In most cases, you lose it. Challenge fees are characterised by firms as service fees, not client deposits. There is no deposit insurance, no compensation scheme, and no regulatory body to pursue recovery. This is the single most important fact about prop firm risk that marketing materials consistently understate. The exceptions are firms that have explicitly structured wind-down procedures that honour payout obligations — Smart Prop Trader’s 2024 closure was cited as an industry reference example of responsible closure practice. But this is at the firm’s discretion, not a legal obligation.
Can the CFTC protect me if a prop firm takes my money?
Potentially, in limited circumstances — but the MyForexFunds case illustrates how complex and uncertain this path is. The CFTC acted against MyForexFunds in 2023 on the basis that the firm was operating as an unregistered commodity pool. The case was ultimately dismissed in May 2025, with the Special Master recommending sanctions against the CFTC itself for procedural misconduct. Enforcement is possible but not guaranteed, and even a successful enforcement action does not guarantee trader fund recovery. The CFTC’s RED List (240+ entities) is a useful reference for firms already identified as problematic — always check it before joining any US-accessible prop firm.
What is the safest prop firm in 2026?
Based on operating history, verified payout records, and structural resilience, FTMO and Topstep represent the strongest cases for longevity. FTMO has a 10-year clean record, a challenge fee refund policy, and now holds a regulated brokerage infrastructure through its OANDA acquisition. Topstep has a 14-year record and $1.1 billion in verified payouts, with proprietary platform infrastructure that eliminates third-party dependency. Neither is regulated in the traditional sense, but both have demonstrated economic sustainability through the industry’s worst period. For futures traders, Topstep; for forex traders, FTMO.
Are prop firm challenge fees refundable if I fail?
In most cases, no. Challenge fees are non-refundable on failure — this is standard across the industry and is the primary revenue model for prop firms. FTMO is the notable exception: it refunds the challenge fee on a trader’s first successful payout, effectively giving traders who succeed their evaluation cost back. Some firms offer partial refunds or discounted retakes; always check the specific terms before purchasing.
Can prop firms change their rules after I’ve started the challenge?
Yes, most can — and some have. Prop firm Terms & Conditions typically include provisions allowing the firm to modify rules, sometimes with notice and sometimes without. The FundingTicks case is the most recent documented example: December 2025 rule changes were applied to existing accounts and completed evaluation stages, resulting in profit clawbacks. Until regulations explicitly prohibit retroactive rule changes, traders must verify the specific language in a firm’s T&Cs regarding rule modification and ensure they are comfortable with the firm’s documented history on this issue.
Do I need to pay taxes on prop firm payouts?
Yes, in virtually all jurisdictions, prop firm payouts are taxable income. The specific treatment — whether as self-employment income, capital gains, or other categories — varies by country and personal circumstances. Some traders have reported that their firm issues payouts from a specific jurisdiction that may have tax implications distinct from their home country. Consult a qualified tax adviser familiar with trading income in your jurisdiction before receiving significant payouts. The tax treatment of prop firm income is not settled in many jurisdictions and may change as regulatory classification evolves.
Is FTMO regulated?
FTMO itself is not a regulated financial services firm in the traditional sense. It is registered as a company in the Czech Republic and operates legally without a financial services licence. However, its January 2025 acquisition of OANDA — a fully regulated broker with FCA, CFTC/NFA, and other Tier-1 licences — is a meaningful step toward regulated infrastructure, particularly for US traders who access FTMO through the OANDA-backed FTMO US offering. The Czech National Bank’s review of whether FTMO’s model falls under MiFID II adds regulatory uncertainty to the picture. FTMO’s regulatory status in 2026 is: legally operating, increasingly institutionally credible, and under review.
What should I do if a prop firm denies my payout?
First, document everything: the completed evaluation, the payout request, and all communications from the firm. Second, check whether the denial references a specific rule in the Terms & Conditions — if the language is vague or the rule was not in effect when you entered the challenge, this strengthens any subsequent claim. Third, file a complaint with the relevant regulator if the firm is in a jurisdiction with active oversight of prop trading (FCA for UK firms, Consob for Italian-based firms). Fourth, post detailed, factual reviews on Trustpilot and relevant trader communities — reputational pressure has been the most effective accountability mechanism in the absence of formal regulation. Fifth, consult a solicitor or attorney regarding civil legal options in the firm’s jurisdiction. There is no regulatory guarantee of recovery, but documentation and community visibility can create meaningful pressure.